Binocular Indirect Ophthalmoscopy
All content on Eyewiki is protected by copyright law and the Terms of Service. This content may not be reproduced, copied, or put into any artificial intelligence program, including large language and generative AI models, without permission from the Academy.
Diagnostic Intervention
Description/Overview
Ophthalmoscopy is a routine exam done by ophthalmologists to examine the inside of the back of the eye, also known as the fundus or the posterior segment. Ophthalmoscopy can be broken up into two types, direct and indirect. Direct ophthalmoscopy provides an upright, unreversed image of around 15 times magnification, while indirect ophthalmoscopy produces a reversed, inverted image magnified 2 to 5 times. [1] Indirect ophthalmoscopy can then be further divided into monocular indirect ophthalmoscopy (MIO) and binocular indirect ophthalmoscopy (BIO).
Although there are several types of ophthalmoscopy, this article will focus on BIO. Unlike MIO where only one view of the interior eye is offered, BIO offers a three-dimensional rendition of the interior eye since it projects three elements.[2] Thus, BIO offers a wide field, stereoscopic view of the retina. BIO also allows dynamic observation of the retina by moving the BIO device, lens, and applying scleral depression.

History
The earliest ideas about ophthalmoscopy dates back to 1846 when Dr. William Cumming, a front runner in the field of ophthalmology, wrote that “every eye could be made luminous if the axis from a source of illumination directed towards a person's eye and the line of vision of the observer were coincident.”[4] Five years later, in 1851, Hermann von Helmholtz designed the first direct ophthalmoscope for medical use.[5] A year later, Christian Ruete made modifications to Helmholtz’s design by implementing a concave focusing mirror, and thereby introduced indirect ophthalmoscopy to allow for a stereoscopic and wider view of the fundus.[6] Dr. Charles Louis Schepens (1912-2006) improved on the original design in 1945 by adding a second lens for the other eye (binocular indirect ophthalmoscope). This allowed him to see an inverted and reversed view of the fundus, with a relatively large field of vision.
Mechanics and Optics
Device
The BIO device consists of a headband, binocular lens with mirrors, and a light source (Figure 1).[7] The examiner wears the device by positioning the headband around his or her head so that the binocular lenses sit directly in front of their eyes.[8] Mirrors in the device split the light reflecting back toward the examiner so the image may be presented to each of the examiner’s eyes. The light is between the doctor's eyes just above the bridge of their nose.


Hand-Held Condensing Lenses
During BIO, a hand held “condensing lens” is held by the examiner, a few inches above the patient’s eye.[10] The purpose of this lens is to “gather” the light rays coming out of the patient’s eyes which are divergent due to the power of the cornea (Figure 2). This lens presents a real horizontally and vertically inverted image in front of the hand held condensing lens on the side towards the examiner (Figure 3).
The power of the condensing lens determines three things: viewing distance, magnification, and field of view. [8] Typical lenses used have a range of: +14D to +30D (D=diopter). As the lens dioptric power increases, magnification decreases and field of vision increases. Low power (i.e. +14D to +18D) lenses offer strong magnification, but a relatively smaller field of view, and below about +20D, the lens needs to be held further from the patient's eye, which may be difficult for some examiners. The magnification of a specific BIO lens is crudely determined by 60/the power of lens.[11] Thus, a +20D lens would have a magnification of 60/20=3X. +20D lens is the most commonly used lens for BIO in adults.[12] For examination of small children (such as patients with retinopathy of prematurity) and those with small pupils, a more high-powered lens is preferred.
Filters
BIO devices may include filters that examiners can employ for different views of the retina.[13]
- No filter, or white light, allows the fundus to be viewed in its natural hue and saturation. This is generally used at the start of an examination to get an overview.
- A yellow filter offers comfort to both the examiner and patient alike because of the decreased intensity of light entering the patient's eye. It may also have a protective effect due to reduced UV exposure. Examiners often use this filter for photophobic patients.
- Because the retina has a predominantly red hue when the fundus is examined with white light, red-free filters allow for clearer contrast between structures and the surrounding tissue. Examiners often use this filter to better view blood, vessels, retinal nerve fiber layer defects, and more. They are also used to distinguish between retinal and choroidal nevi, since choroidal lesions seem to disappear with a red-free filter.
- Blue filters are used by examiners to better view pathologies that exist in front of the membrana limitans interna and the anterior retinal layers, as these layers reflect blue light. They can also be used to more clearly view the eye after a fluorescein angiography, and may be used to do fluorescein angioscopy - BIO of the peripheral retina with a blue filter to identify peripheral neovascularization after the patient has been administered sodium fluorescein intravenously.
Procedure

Technique to Perform BIO[15]
- Ensure the patient is well dilated.
- Position the patient flat and supine with space around the head for the examiner to move freely around.
- Choose the appropriate condensing lens to use for the specific patient, exam, and examiner skill level.
- Securely fasten the BIO device to the examiner’s head.
- Adjust the pupillary distance and height of the beam so the examiner can see a full beam with each eye.
- Check spot size and illumination intensity. For well dilated patients, use the largest spot size. For smaller pupils and intraocular gas, use a smaller spot size. Start with lower illumination and slowly increase light intensity as needed and as tolerated by the patient.
- Apply a filter if desired or needed for the specific patient and exam.
- Hold the lens right-side up to minimize distortion and approximately 2 inches from the patient’s eye. If possible, stabilize your hand gently against the patient’s head. Move the lens in and out from the patient’s eye to focus and refine the view.
- To start, the patient should be looking directly up and the examiner should stand to the side of the patient, leaning over. The examiner views different parts of the retina by tilting their head and walking around the patient.
- The examiner instructs the patient to look at various extremes of their vision until all 360 degrees of the peripheral retina have been examined. To see the superior retina, instruct the patient to look up. To see the inferior retina, instruct the patient to look down.
- Perform scleral depression if this technique is needed during the exam to better view the peripheral retina.
- The macula is examined last, as the light is bright and patient cooperation for BIO may reduce drastically if the macula is examined at the start.
Additional Aspects
Dilation
The examiner looks through the pupil to view the posterior segment of the eye. However, the undilated pupil restricts the field of view dramatically. Further, the bright light of BIO usually makes the pupil very small. [16] Examiners will generally decide to administer dilating drops into the eyes, also known as mydriatics. Mydriatics come in two forms: parasympathetic antagonists such as tropicamide 0.5%, or sympathetic agonists such as phenylephrine 2.5% or 10%.[17] Parasympathetic antagonists are used to paralyze the iris sphincter muscle while sympathetic agonists are used to stimulate the iris dilator muscle. Through this enlarged or dilated pupil, the examiner is able to view the center and periphery of the retina.
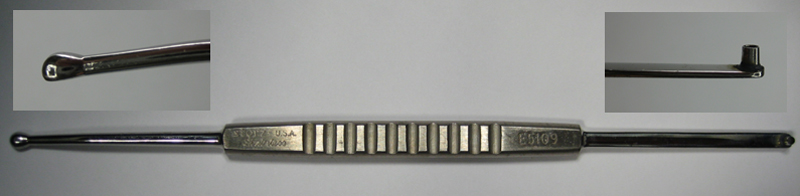
Scleral Depression
A technique commonly used with BIO is scleral depression.[8] This complements the dynamic viewing of the retina and vitreous. The forward and inward curvature of the globe in the anterior portion of the eye obscures and prevents far peripheral viewing. Therefore, scleral depression is needed to indent the sclera and bring the peripheral retina into view. To depress the sclera, a scleral depressor is placed against the sclera (either on the globe or on the eyelid overlying the globe) and gentle firm pressure is applied. To the examiner, the scleral depressor creates an elevation or "bump" at the point of depression. By looking at the "bump," the examiner can view more of the fundus periphery. Scleral depression is a helpful way of examining patients who are at risk of peripheral retinal anomalies such as tears or detachments. When patients have high risk symptoms such as flashes and floaters, scleral depression is highly recommended to allow complete viewing of the retina.
Examples of available scleral depressors include:
- Schepens scleral depressor (with thimble) - Image Link
- OConnor scleral depressor (usually used intraoperatively) - Image Link
- Schocket double ended scleral depressor - Image Link
- Josephberg Besser scleral depressor - Image Link
- Flynn Scleral depressor - Image Link
Additional Resources
- Randolph JD. 3 Tips for Indirect Ophthalmoscopy. American Academy of Ophthalmology. February 23, 2023. Accessed June 10, 2023. https://www.aao.org/young-ophthalmologists/yo-info/article/3-tips-for-indirect-ophthalmoscopy.
References
- ↑ ophthalmoscope. In: Miller-Keane Encyclopedia and Dictionary of Medicine, Nursing, and Allied Health, Seventh Edition. The Free Dictionary Website. Accessed June 10, 2023. https://medical-dictionary.thefreedictionary.com/ophthalmoscope.
- ↑ Inspecting the difference between direct vs indirect ophthalmoscopes. Keeler. January 5, 2022. Accessed June 10, 2023. https://www.keelerusa.com/blog/post/inspecting-difference-direct-vs-indirect-ophthalmoscopes.
- ↑ Giaconi JA. American Academy of Ophthalmology. Indirect ophthalmoscope. Accessed June 10, 2023. https://www.aao.org/education/image/indirect-ophthalmoscope-6.
- ↑ Cumming W. On a luminous appearance of the human eye, and its application to the detection of disease of the retina and posterior part of the eye. Journal of the Royal Society of Medicine. 1846;MCT-29(1):283-296. doi:10.1177/095952874602900118
- ↑ Kalayoglu MV. Helmholtz, Schepens, and Now: The Evolution of the Modern Binocular Indirect Ophthalmoscope. Ophthalmology Web. February 16, 2005. Accessed June 10, 2023. https://www.ophthalmologyweb.com/Tech-Spotlights/26431-Helmholtz-Schepens-and-Now-The-Evolution-of-the-Modern-Binocular-Indirect-Ophthalmoscope/.
- ↑ Keeler CR. The Ophthalmoscope in the Lifetime of Hermann von Helmholtz. Archives of Ophthalmology. 2002;120(2):194. doi:10.1001/archopht.120.2.194
- ↑ ophthalmoscope. In: Millodot: Dictionary of Optometry and Visual Science, 7th edition. The Free Dictionary Website. Accessed June 10, 2023. https://medical-dictionary.thefreedictionary.com/ophthalmoscope.
- ↑ Jump up to: 8.0 8.1 8.2 Agarwal P. Looking Deep into Retina: Indirect Ophthalmoscopy and Fundus Drawing. Slideshare. Accessed June 10, 2023. https://www.slideshare.net/prachira/looking-deep-into-retina-indirect-ophthalmoscopy-and-fundus-drawing.
- ↑ Atebara NH, Wooley CH. American Academy of Ophthalmology. Indirect ophthalmoscope. Accessed June 10, 2023.https://www.aao.org/education/image/indirect-ophthalmoscopy.
- ↑ Cordero I. Understanding and caring for an indirect ophthalmoscope. Community Eye Health. 2016;29(95):57.
- ↑ ophthalmoscope. In: Millodot: Dictionary of Optometry and Visual Science, 7th edition. The Free Dictionary Website. Accessed June 10, 2023. https://medical-dictionary.thefreedictionary.com/ophthalmoscope.
- ↑ Cordero I. Understanding and caring for an indirect ophthalmoscope. Community Eye Health. 2016;29(95):57.
- ↑ Schmit-Eilenberger V. Colour Filters When Using an Indirect Ophthalmoscope. HEINE. Accessed June 10, 2023. https://www.heine.com/en_US/medical-specialties/ophthalmology/application-and-diagnostic-tips/diagnostics-with-the-indirect-ophthalmoscope/colour-filters-indirect-ophthalmoscope.
- ↑ Roybal CN. Indirect Ophthalmoscopy 101. American Academy of Ophthalmology. February 25, 2023. Accessed June 15, 2023. https://www.aao.org/young-ophthalmologists/yo-info/article/indirect-ophthalmoscopy-101.
- ↑ 10. Kalayoglu MV. Helmholtz, Schepens, and Now: The Evolution of the Modern Binocular Indirect Ophthalmoscope. Ophthalmology Web. February 16, 2005. Accessed June 15, 2023. https://www.ophthalmologyweb.com/Tech-Spotlights/26431-Helmholtz-Schepens-and-Now-The-Evolution-of-the-Modern-Binocular-Indirect-Ophthalmoscope/.
- ↑ Boyd K. What are dilating eye drops? American Academy of Ophthalmology. October 27, 2022. Accessed June 10, 2023. https://www.aao.org/eye-health/drugs/dilating-eyedrops.
- ↑ Fundoscopic Exam (Ophthalmoscopy). Stanford Medicine 25. Accessed June 10, 2023. https://stanfordmedicine25.stanford.edu/the25/fundoscopic.html.